

Toothpaste dispensers have one reputation problem: people assume cleaning them is more work than just leaving a tube on the shelf. It’s an easy assumption to make, but it doesn’t hold up. The fix is a two-minute rinse and a small habit or two built into your weekly routine.
At Made Minimal, we work with bathroom accessories every day, so we know what holds up and what becomes a nuisance over time. In this article, you’ll find out why dispensers get gunky and how to clean yours properly. We’ll also cover what to do when you switch toothpaste brands and which design features make maintenance easier.
Why Your Toothpaste Dispenser Gets Gunky
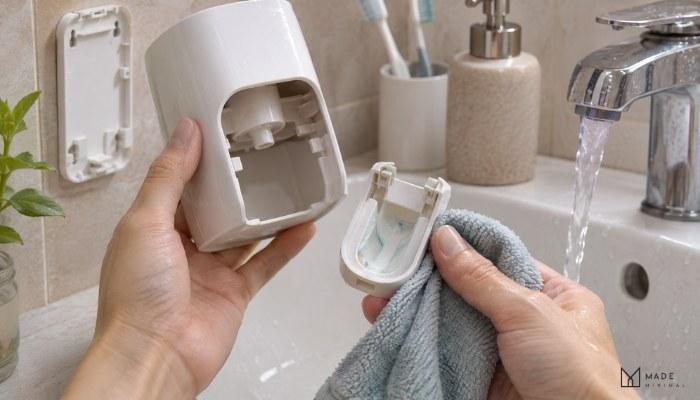
If you’ve ever pulled your dispenser off the wall and wondered how it got so grimy, the answer is inside the nozzle. Residue dries against the interior walls and sets within a few days. At that point, a quick splash of water won’t clear it.
The type of toothpaste you use affects where residue builds up and how fast it dries. Some buildup is normal with regular dispenser use:
Gel vs Paste: How They Behave Differently
Gel toothpaste stays wet longer than other types. It pools inside the nozzle and along the chamber walls, then dries into a sticky film that coats the interior surfaces after a few days of regular brushing.
Paste behaves differently; it quickly dries up and flakes around the tip. As a result, a chalky residue shows up after just a couple of uses.
It’s Not a Hygiene Problem
Most people assume a gunky dispenser means their bathroom isn’t clean, but buildup has nothing to do with hygiene. Every time you pump it, toothpaste meets air and residue starts to form.
Even a dispenser used twice a day will collect grime within a week. What you’re seeing is dried toothpaste rather than contamination lurking in the chamber.
A Simple Weekly Rinse for Bathroom Hygiene
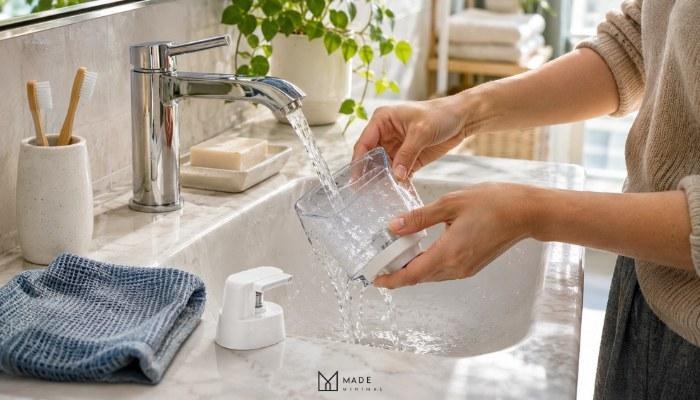
Keeping a toothpaste dispenser clean doesn’t require any special products or tools. Warm water and two minutes once a week are enough to stop residue from hardening inside the chamber.
Dentists already suggest you clean toothbrush holders at least once a week, and your dispenser works well on that same schedule. The washing process itself breaks down into three simple steps.
- Warm Water Rinse: Run warm water through the dispenser chamber once a week. This clears toothpaste residue before it sets against the interior walls and becomes difficult to shift without scrubbing.
- Nozzle Wipe: Give the nozzle tip a quick wipe with a damp cloth straight after rinsing. We’ve done this enough times to know that thirty seconds on the tip prevents most of the visible grime from building back up. It’s worth making this a check you do every time, rather than just when things look dirty.
- Air Dry: After washing, leave the dispenser somewhere it can air-dry fully before reattaching it to the wall. Trapping moisture inside the chamber is one of the main reasons buildup returns so fast. Letting it dry completely keeps it hygienic between cleans and helps it last longer.
That three-step routine takes under five minutes and keeps your bathroom dispenser in good condition week to week. Once it becomes part of your habit, you’ll barely notice the extra step.
What to Do When You Switch Toothpaste Brands
Most people skip this step entirely, and it’s usually why their dispenser stops pumping smoothly. When you switch toothpaste brands without flushing first, the old residue and new formula mix inside the chamber.
Those two formulas dry at different rates and harden into different textures, and the combination sets into a clog that blocks the pump. Gel and paste are especially bad together for this reason. To avoid a clog, flush the chamber before loading the new tube. Start by removing the dispenser from its wall mount and taking out the old toothpaste tube.
And before putting a new tube in, run warm water through the chamber two or three times until it runs clear. Then wipe the nozzle and leave it to dry completely. It’s worth noting that this takes under a minute and keeps your dispenser working the way it should.
What to Look for in Bathroom Accessories Built for Easy Cleaning
A well-designed dispenser does most of the maintenance work for you. When you’re comparing options, two design details make the most difference:
Key Features of a Low-Maintenance Toothpaste Dispenser
Dispensers with removable nozzles and chambers can be rinsed in under a minute. You won’t need to work around fixed parts or risk missing residue in spots you can’t reach. Beyond that, look for smooth interior surfaces with no grooves or ridges along the walls.
The dispenser’s materials also play a role. Non-porous surfaces resist stains and are easier to wipe clean between washes. Residue grips onto textured surfaces and builds up faster.
Why a Wall Mounted Toothpaste Dispenser Works Better
Mounting your dispenser on the wall keeps the base off the sink surface, which removes one of the most common spots for grime to collect underneath. It’s also a perfect fit for bathroom fixtures like towel rails and toilet roll holders that are already wall-mounted, and it keeps the whole layout consistent.
For placement, fixing it to the shower tiles at a convenient height keeps it away from direct bathtub and shower spray. That means you won’t need to wipe the exterior as often, saving you time on the weekly clean.
Wall mounting is also ideal for households with children, since it keeps the dispenser at a suitable height and out of reach of the vanity clutter. For anyone with limited hand function, it makes the dispenser far more accessible than reaching across a wet shelf.
Small Habits for a Cleaner Minimalist Bathroom
A clean minimalist bathroom needs little daily effort when you pay attention to the areas where moisture and grime collect. These five habits help keep your dispenser and nearby surfaces in good condition between weekly cleans.
- Wipe Toothpaste Drips: After brushing, wipe up fresh toothpaste marks with a damp cloth before they dry. The underside of the dispenser also needs attention, as residue often collects there.
- Dry Toothbrushes: Toothbrushes dry better when stored upright with space between their heads. Excess water can collect around the holder, so give the area a quick wipe.
- Control Moisture: During showers, the exhaust fan helps remove humid air. Leave it running for another 15–20 minutes afterwards to help dry the room. If your bathroom doesn’t have an exhaust fan, open the window during and after showers to let humid air escape. In windowless bathrooms without a fan, wiping down wet surfaces with a towel after each shower is the simplest way to reduce moisture buildup.
- Check the Mounting: A quick check every few weeks helps you spot loose screws or weakening adhesive. Pay attention to any movement when pressing the dispenser.
- Clear Clutter: With fewer bottles around the sink, you have less to move during cleaning. Store spare toiletries in a cabinet and keep everyday items within easy reach.
Small habits work best when they fit naturally into your routine. A quick wipe, proper ventilation, and occasional mounting checks help keep your bathroom tidy and your dispenser in good condition.
Keeping Your Bathroom Accessories Working Like New
A toothpaste dispenser is one of those bathroom accessories that stays clean with very little effort once you know what you’re doing. A weekly rinse, a nozzle wipe, and a quick flush between toothpaste brands cover most of it.
Where you mount it and how it’s designed also affect upkeep. The right choice makes daily bathroom use easier. If you’re looking for a dispenser that suits a minimalist bathroom and everyday use, explore the full collection at Made Minimal.
Every item combines style with practical design. You’ll find options to suit different bathroom layouts and complement your space.
